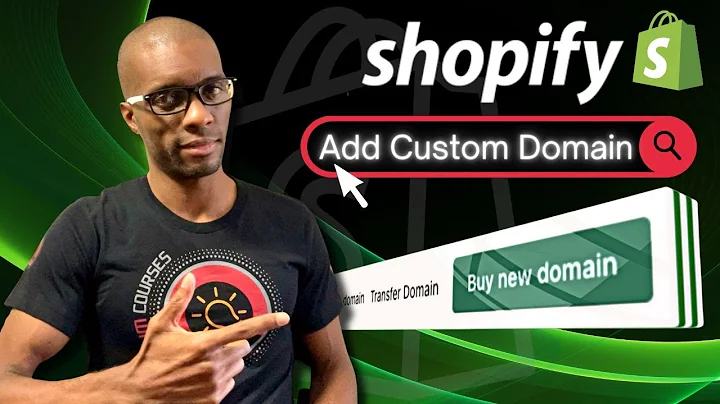
hey guys jason here with quantum courses,and in this tutorial we'll be going over,the process to set up a new shopify,store and how to select and customize,your store theme,but before we get started make sure you,hit that subscribe button the,notifications bell and if you want to,support the channel feel free to hit the,super thanks button as well,shopify is by far the most popular,e-commerce platform today that allows,anyone to open their own branded,e-commerce store,they provide you with tons of tools to,help you build your ecommerce shop and,offer various free and paid themes that,you can easily customize,shopify allows you to select from a,variety of themes for your online store,and customize it with your own images,text logos and even videos,in this tutorial i'll be demonstrating,how to set up your shopify store by,adding your store details selecting a,theme customizing your theme and tons,more there are many other settings we'll,take a look at as well such as adding,your favicon and your social media links,we'll even go over how to create some,eye-catching graphics for your store,such as your logo your banner and your,featured images,once you complete the steps in this,video your shopify store will be set up,and ready to be loaded with products,to sign up to shopify and follow along,go ahead and head over to jasongandy.org,or simply click the link in the video,description for a 14 day free trial,so hopefully you've already created your,shopify account so now let's log in and,set up our store to log in go ahead and,look up at the top right and click on,the login tab,this should take you to the shopify,login screen go ahead and put in the,credentials that you signed up with then,click on continue this will take you to,your account dashboard where you can,analyze and manage your shopify store as,a new shopify seller the first thing we,want to do is set up our store with our,shop details to do this we're gonna go,to the settings menu if you look at the,menu on the left hand side and go all,the way down to the bottom you should,see the settings tab let's click that,now this will open up a new window where,you can add your store details and other,information,on the storage details tab you can add,your store's basic information address,contact information and more to add or,change any information look at the right,hand side of the section you want to,change and click the edit tab,under basic information go ahead and,select the store name the legal name of,your company if you have one and select,your store industry for my example,shopify store i'm going to name it,quantum designs i already have my,business name here and if we go to the,drop down menu under store industry we,can see tons of different categories,that you can select from for my shopify,store i plan on selling print-on-demand,products so let's just select clothing,if you continue scrolling down under the,store details tab and your standards and,formats,under store currency go ahead and select,the currency that you wish to sell your,products in keep in mind that after,you've made your first sale you'll have,to contact support to change this,under standards and formats go ahead and,select the time zone that you're in the,unit system you wish to use and your,default weight unit i'm in the us so for,my store i'm going to use the eastern,time zone the imperial unit system and,pounds as my default weight unit the,information will be used to calculate,product prices shipping weight and order,times,you also have the option to edit your,order id format order ids start at 1001,by default but you can add a prefix or a,suffix if you want to customize it,once you've finished updating everything,on the store's details tab make sure you,go down to the bottom right here and,click on the save button,under store details you also have the,plan tab,here's where you can go to see your,current shopify plan you can see your,plan details the billing cycle and,update your plan if you want new,features,under the users and permissions tab you,can manage what users can do and see in,your store,you can also add staff members and,collaborators such as designers and,developers,next we have the payments tab,here's where you can view the various,rates and fees for shopify payments view,all of your previous payments connect,your bank account and add additional,payment methods,next we have the checkout tab here's,where you can update your checkout style,decide whether or not customers need to,create an account for your store and,update your customer contact method,if you click on the customize checkout,button here you'll be able to view and,update your store's checkout page,from here you can add a logo change your,colors change your text and much more,also on the checkout tab you can update,your customer contact method your,required customer information select how,orders are processed and even add,tipping to your checkout,next we have the shipping and delivery,tab here's where you can add your,shipping information such as what you,ship to and how much you charge for,shipping you can also access packing,slip templates and also select your,carriers,the next tab we have here is our taxes,and duties,here's where you can select the,countries and regions where you're,obligated to collect taxes and duties to,search various regions and countries,simply use the search bar here you'll be,able to view all the various areas where,you're currently collecting taxes,under the locations tab you can add,locations where you stock your inventory,sell your products or fulfill your,orders this can include both physical,locations and third-party services that,manage inventory and fulfill orders,on shopify you can also create gift,cards for your customers if you click,the gift cards tab you can create gift,cards that auto expire after a certain,time after they've been purchased you,can even enable apple wallet passes for,digital gift cards,if you wanted to sell in multiple,regions and become a truly global,business you can use the markets tab,here here you'll be able to add new,markets and even customize the currency,language and domains,under the sales channels tab you can,view all of the sales channels that,you're currently set up on and add new,sales channels as well this will include,things like your online store any buy,buttons that you've set up your facebook,shop and more,under the domains tab you can view all,of the domains you currently have,connected to your online store by,default your online store will already,have a domain which is your store,name.myshopify.com,from here you can connect an existing,domain transfer a domain or even buy a,new domain directly from shopify,if you want to add a new domain you can,easily purchase the domain directly from,shopify making the process super easy,as an example let's purchase,quantumdesignshop.com as a new domain,for my online store you can simply,search for the domain that you want and,you'll see tons of different options,that you can select from for my store,i'm going to use the dot com version,which is around 14 per year so let's,click on the buy button you can then,finalize your order and even set it to,auto renew each year once you've added,all of your information go ahead and,click on buy domain,and voila the new domain for my online,store has now been purchased and added,to my shopify account,if you already have multiple domains you,can click the settis primary option here,to use your new domain for your shop the,next tab we have on our menu here is the,brand tab,here's where you can start customizing,your online store with your own branding,including your logo your brand colors,and much more on shopify your default,logo will be shown in most places it,should be in heic jpeg or png format and,have a minimum of 512 pixels,to add your logo go ahead and click the,plus sign icon on the right hand side,here this should pull up your image,gallery to upload our logo let's click,on the add image button you can then,find your logo then click on open,once your logo finishes uploading make,sure you have it selected then click on,done at the bottom right,and there we have it my new logo has,been added to my shopify store if you,look on the right hand side you can also,see a small preview of how my new logo,will look in my shop a square version of,your logo will also be added which is,used on some social media accounts under,your logos you can also select your,online store primary and secondary color,when selecting your colors make sure,you're selecting colors that are,consistent with your brand,once you select your colors you can then,add a cover image your cover image is,the key image for your brand and should,be at least 1920 by 1080 pixels when,adding your cover image make sure it's,in heic jpeg or png format and is,consistent with the branding of your,store if you need a fast and easy way to,create cover images logos and other,graphics for your store you can head,over to jasongandy.org and click the,unlock canva pro button to try the best,online design tools for free they,provide you with thousands of free,templates graphics and other elements to,easily and quickly create amazing,content for your online store once you,unlock canva pro you'll have everything,you need to create all the graphics for,your store eye-catching social media,posts to market your products and even,attention-grabbing animated videos to,give canva pro a try for free go ahead,and head over to jasongandy.org and,click the unlock canva pro button or,simply click the link in the video,description,so now that i've used canva pro to,create a cover image for my store let's,click the add cover image button here,just like we did when uploading our logo,let's click on add image then open up,the cover image we just created once it,finishes uploading make sure it's,selected then click on done,there we go my quantum design store now,has a cover image,under your cover image you can also add,your brand slogan this will be a short,tagline typically used with your logo,that can be up to 80 characters,next you can add a short description of,your store which is typically used in,your bios and listings this is a brief,description of your store which can be,up to 150 characters,and finally you can click the drop down,menu here to connect your social media,brand pages simply select the platform,that you want to connect then paste in,the link to your page,once you've added your logo cover image,descriptions and other branding make,sure you look up at the top right here,and click the save button,and voila we just set up basic branding,for your store,if we scroll back up to the top of the,page and check out our store preview we,can see all of the graphics and elements,that we just added so let's check out,the last few menus under your shopify,settings,under brand you have your notification,tab here's where you can edit the sms,and email notifications that are sent to,your customers if you wanted to,customize your email templates simply,click the customize button here,this will take you to a page where you,can customize the email template that's,sent to your customer each time they,make a purchase,you can also view and edit your order,shipping and delivery notifications that,are sent for various actions below this,you also have your marketing section,where you can manage your consent and,tracking options,next on your menu here is the meta,fields tab here's where you can select a,part of your store to add custom fields,to which we'll go over in a later video,under the files tab you can upload new,files to your shopify account and view,all the previous files that you've,already uploaded so now that we've gone,through a brief overview of your shopify,settings let's go over how to select and,customize your shopify store theme,under sales channels on the menu on the,left hand side go ahead and click on,online store this should open up various,options including your themes tab where,you can manage your shopify theme,at the top of the page you can see your,live theme which is the theme you,currently have selected for your store,and if you scroll down you can access,the theme library where you can browse,and select a new theme for your shopify,store if you have a theme you want to,upload you can click the drop down menu,here and upload a zip file or connect to,github you can also see all the themes,you currently have installed,and at the bottom you can browse the,shopify theme store and explore free,themes,if we click the explore free themes,button we can see several free themes,that are available on shopify that you,can use once you select a theme you'll,be able to fully customize it with your,own graphics images text and other,branding,so take your time and browse through the,various themes and once you're ready go,ahead and select the one you want to use,once you've selected a new theme you,should see it added to your theme,library,to activate your new theme go ahead and,click on the actions drop down menu here,and click on publish,your new theme should now be viewable in,the live theme section at the top of the,themes page,now that we've selected a theme for your,store let's customize your theme with,your brand graphics and details,if you click the customize button on the,right hand side here you'll be taken to,a page where you can customize your,shopify store homepage,as you update your theme you'll be able,to see your updates appear on the theme,preview on the right hand side so let's,start by clicking the header tab to,customize our header your header is,shown at the top of your shopify store,and displays various elements such as,your logo and your menu,if you look here you can see the,recommended logo size which is 450 by,200 pixels i've already used canva pro,to create my logo using the correct,dimensions so let's add it to my header,if we click on select image we'll be,taken to the image library where we can,browse and upload new images,so let's click on the upload button here,and find my header logo that i created,with canva once you open your image it,should automatically start uploading and,when it's finished it should appear in,your theme preview on the right hand,side once your logo has been added make,sure you go down to the bottom and click,the select button under your logo image,you should see another link that you can,click to add alt text this is a brief,description of your brand or logo that,can help with your seo go ahead and,describe your brand business or products,in 255 characters or less,once you're finished click the save,button now let's move on to the next,section of our header which is the main,menu here's where you can change edit or,remove the main menu that's displayed in,your header to change or create a new,menu simply click the change drop down,menu here then click on change menu you,can then select the menu that you've,already created or use the option up top,here to create a new menu when you,select to create a new menu you'll be,taken to the add menu page here's where,you can create a new menu by coming up,with the title then adding your menu,items if you click the add menu item,option here a new window will pop up,allowing you to name your item and if,you click the link box here you can,select from various places you want your,menu item to link to,this includes your store home page your,collections your products your blog,posts and more,once you've created your new item go,down to the bottom right and click the,add button and my new menu item has now,been added feel free to add as many menu,items as you wish once you're finished,go down to the bottom right and click on,the save menu button now that i've saved,my new menu it should now be available,to add to my theme,if we head back over to the theme,customization page and select the option,to change our header menu you can see,that the new menu that i just created is,now available and can now be added to my,header when you select a new menu you,should see your store updated in the,preview on the right hand side if,everything looks good go ahead and click,on select down at the bottom,in the next section here you can add,some text to the top bar of your header,this is a great place for your brand tag,liner slogan for your top bar text you,can have a maximum of 55 characters when,you add your text you should see it come,up in the preview on the right so you,can see how it looks in your online,store,and finally if you go down to the very,bottom under theme settings you can,update the colors for the lines and,borders that's in your header when,selecting your colors make sure you're,selecting colors that complement your,brand for my lines i think i'll change,them to red once you finish updating all,the elements in your header make sure,you go up to the top right here and,click the save button,and voila your new store header has now,been created so let's click the back,button on our menu here and see what,else we can customize on our shopify,theme,next we have our slideshow tab,here's where you can add a slideshow to,your homepage to display your products,your brand or anything else you like,just a quick note if you wanted to hide,a section you can click the eyeball icon,on the right but for my home page i'm,going to create a slideshow so let's,click on add slide under the slideshow,section a blank image should then appear,under your heading in the preview on the,right so let's click the blank slide,here and go over how to add our image,when you click the slot it'll bring up a,menu where you can either select an,image or add an image url for my,slideshow i've already created a few,different images using canva pro,so to add my image to my slideshow let's,click the select image button here this,should open up your image library just,like before let's click the upload,button find the image i just created,then click on open once your image,finishes uploading you should see it,added to the preview on the right if,everything looks good go ahead and click,on select down at the bottom,there we go,so let's click the back button here go,back to our slideshow section and click,the add slide tab to add another slot go,ahead and follow the same process for,all the images you wish to add to your,slideshow,once you add multiple images you should,see an animated preview on the right,hand side if everything looks good go,ahead and click on save at the top right,and there we go my new online store now,has a slideshow on the home page,so let's click the back button and see,what else we can add,so we've already created our header and,our slideshow and the framework of our,store is looking like it's starting to,come together,the next section we have here is our,collection list,once we add various products to our,store we'll be able to create,collections to display our products,based on various categories,there are several ways to add products,to shopify which we'll go over in other,videos so for now i'm gonna click the,eyeball icon here to hide the collection,list from my home page,so let's move on to the next section,which is the rich text here's where you,can add a simple text block to your home,page if we click on add block here we,can select to add a page or text if i,click on text you should see a text,field appear on the preview on the right,hand side if we click the text block it,should open up a menu where we can edit,the heading and the text go ahead and,fill in your text with information about,your brand your products your business,or simply welcome customers to your,online store,once you're finished make sure you look,up at the top right and click on the,save button,so let's click the back button and head,back to the home page menu,so we've gone over how to create our,header how to add a slideshow and how to,add a text box to our home page these,are just the default sections for this,theme but if you go down to the bottom,here and click on add section you can,view a drop down list of tons of other,sections you can add to your home page,as well,as you can see they have several,different sections you can choose from,so as an example let's select video with,text,you should then see the video with text,section added to my menu on the left and,a preview should be on my home page on,the right adding a video to your shopify,homepage is a great way to grab,customers attention so let's click on,the preview here and open up the video,menu,to add a video simply upload it to,youtube or vimeo first then paste in the,link here i've already created my video,using the canva pro animated video,creator and uploaded it to my youtube,channel so let's copy the link to my,video and paste it into the text field,here,and voila your video should then appear,both in your menu and on your preview if,we click the text beside the video here,you can edit your text heading and add,some details about your video in the,description once you're finished make,sure you go up to the top right and,click on the save button and now your,home page should have an awesome video,that your customers can view,so let's head back to the home page menu,and see what else we have to add,under the add section tab we have our,footer section here's where you can,update the footer that's displayed at,the bottom of your homepage,if you select the payment icons checkbox,here you'll notice that various payment,methods will be displayed at the bottom,of your footer this is a great way to,add a little authority to your page and,let people know how they can pay if you,click on theme settings here you'll be,able to add links to your social media,brand pages they have all the top,platforms and when you add a page you'll,see the platform icon displayed down,here in the footer once you add all the,links to your brand pages go up to the,top right and click the save button,so let's click the back button and see,what else we can add to our footer,in the footer section you should also,see other items you can edit as well,you can add things like a main menu a,newsletter sign up and other items by,clicking the add block icon here feel,free to take your time and go over the,various options and customize your,footer however you like,so now that we're finished setting up,our shopify homepage and footer let's go,down to the bottom here and check out,our theme settings,here's where you can update various,elements of your theme such as your,layout your colors your typography your,favicon and more,if i click on layout i can select to,enable or disable wide layout under the,colors menu i can select various options,for my theme such as my theme background,i can click the check box here to select,the default background and if i wanted,to upload a cover image i could use the,button here,you can also update all the various,colors of your theme such as your,buttons and your text,for my theme i think i'll make my top,text a little bit brighter to make it a,bit easier to read,under typography you can select the,fonts for various elements of your theme,and also the text sizes if we click the,drop down menu here under font you can,see that they have tons of different,fonts that you can select from take your,time and browse the various fonts and,make sure you select a font that,complements your brand,under typography we have our favicon,menu here's where you can upload your,brand's favicon image which is typically,your square image of your logo your,favicon is the icon that's typically,displayed in your browser's address bar,or next to the site name in your,bookmark list your image will,automatically be scaled down to 32x32,pixels so just make sure you upload a,square image once you upload your,favicon make sure you go down to the,bottom and click on select,here favicon has now been added to your,theme,under our favicon we have our social,media menu this is another location,where you can add links to your brand,pages,once you add your links you can then,select your sharing options which is the,ability to share on facebook twitter and,pinterest and also select your button,style which is fully branded or logo,only and under your social media links,you also have the checkouts menu where,you can edit how your checkout page will,look on your store you can add a,background image edit your typography,edit your colors and more,so once you're finished editing your,theme settings make sure you go up to,the top right here and click on the save,button,so now that we're finished setting up,our shopify store and customizing our,theme let's check out a preview of how,it looks,if you click the icon up here in the top,menu you can preview how your online,store will look on mobile desktop and on,full screen,go ahead and preview all the various,devices and make sure everything looks,good,so now that everything is set up let's,click the top left button here to exit,the theme editor,in the live theme section up top here we,can now see some of the changes that we,just made,so now let's get a live preview of my,store by clicking the view your store,link here,this should take me directly to my,shopify page and display the url i,purchased for my page earlier in the,video so now whenever anybody goes to,quantumdesignshop.com,they'll be taken directly to my new,shopify page so now let's check out my,live online store and see how it looks,up top we have my header with my top bar,text my logo and my menu,next we have my slideshow which is,currently displaying two rotating images,we have my text box with my welcome,message in my brand description and we,have my promo video with the descriptive,text adding a video to your home page is,a really cool feature that your,customers will love not only can you,display your products and information,about your brand but also show your cell,phone video explaining more about your,business,and at the bottom of my home page we,have my footer you should be able to see,all the various elements that you added,to your footer such as your menu and,your social media links when a customer,clicks one of the social media icons,they should be taken directly to your,brand page,so that's a quick overview of how to set,up your shopify store and customize your,shopify store theme if you enjoyed the,video make sure you hit that like button,and subscribe to the channel thanks for,watching and i'll see you next time
Congratulation! You bave finally finished reading where is the head section of my shopify website and believe you bave enougb understending where is the head section of my shopify website
Come on and read the rest of the article!
 3.5K Ratings
 WHY YOU SHOULD CHOOSE TTHUNT